- Impex
- Documentation
- Mounting of USB Protect Gen2.
IMPEX USB Protect delivery
IMPEX USB Protect is delivered in a package to protect the device during transport.
Package contents
- 1 IMPEX USB Protect Gen2
- 1 Foot stand for placing IMPEX USB Protect on tables
- 1 Powercord CEE 7/7 to C13, 230V
- 1 bag of rubber seal for cable entry
Observe IMPEX USB Protect use tamper protection with tamper tape on the parts that only shall be opened by SYSCTL. Only the service hatch should be opened.
Specification of screws
- 4 screws used for the service hatch of the type M3 MFX 6mm black
- 4 screws used for the foot stand of the type VESA M4x8L
Not included in the delivery
- No screwdriver is included
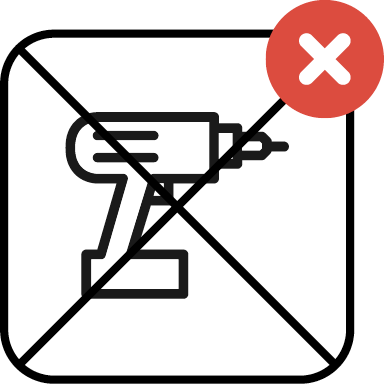
Electric screwdriver should not be used to avoid damage on the screw heads or the screw fasteners

\pagebreak
Assembly
Unpack the package on a flat surface. The touch screen is sensitive for scratches and should be protected during the assembly phace.
- Place the IMPEX USB Protect with the screen facing down on a protective surface, preferably use the protective material of the carton for this.
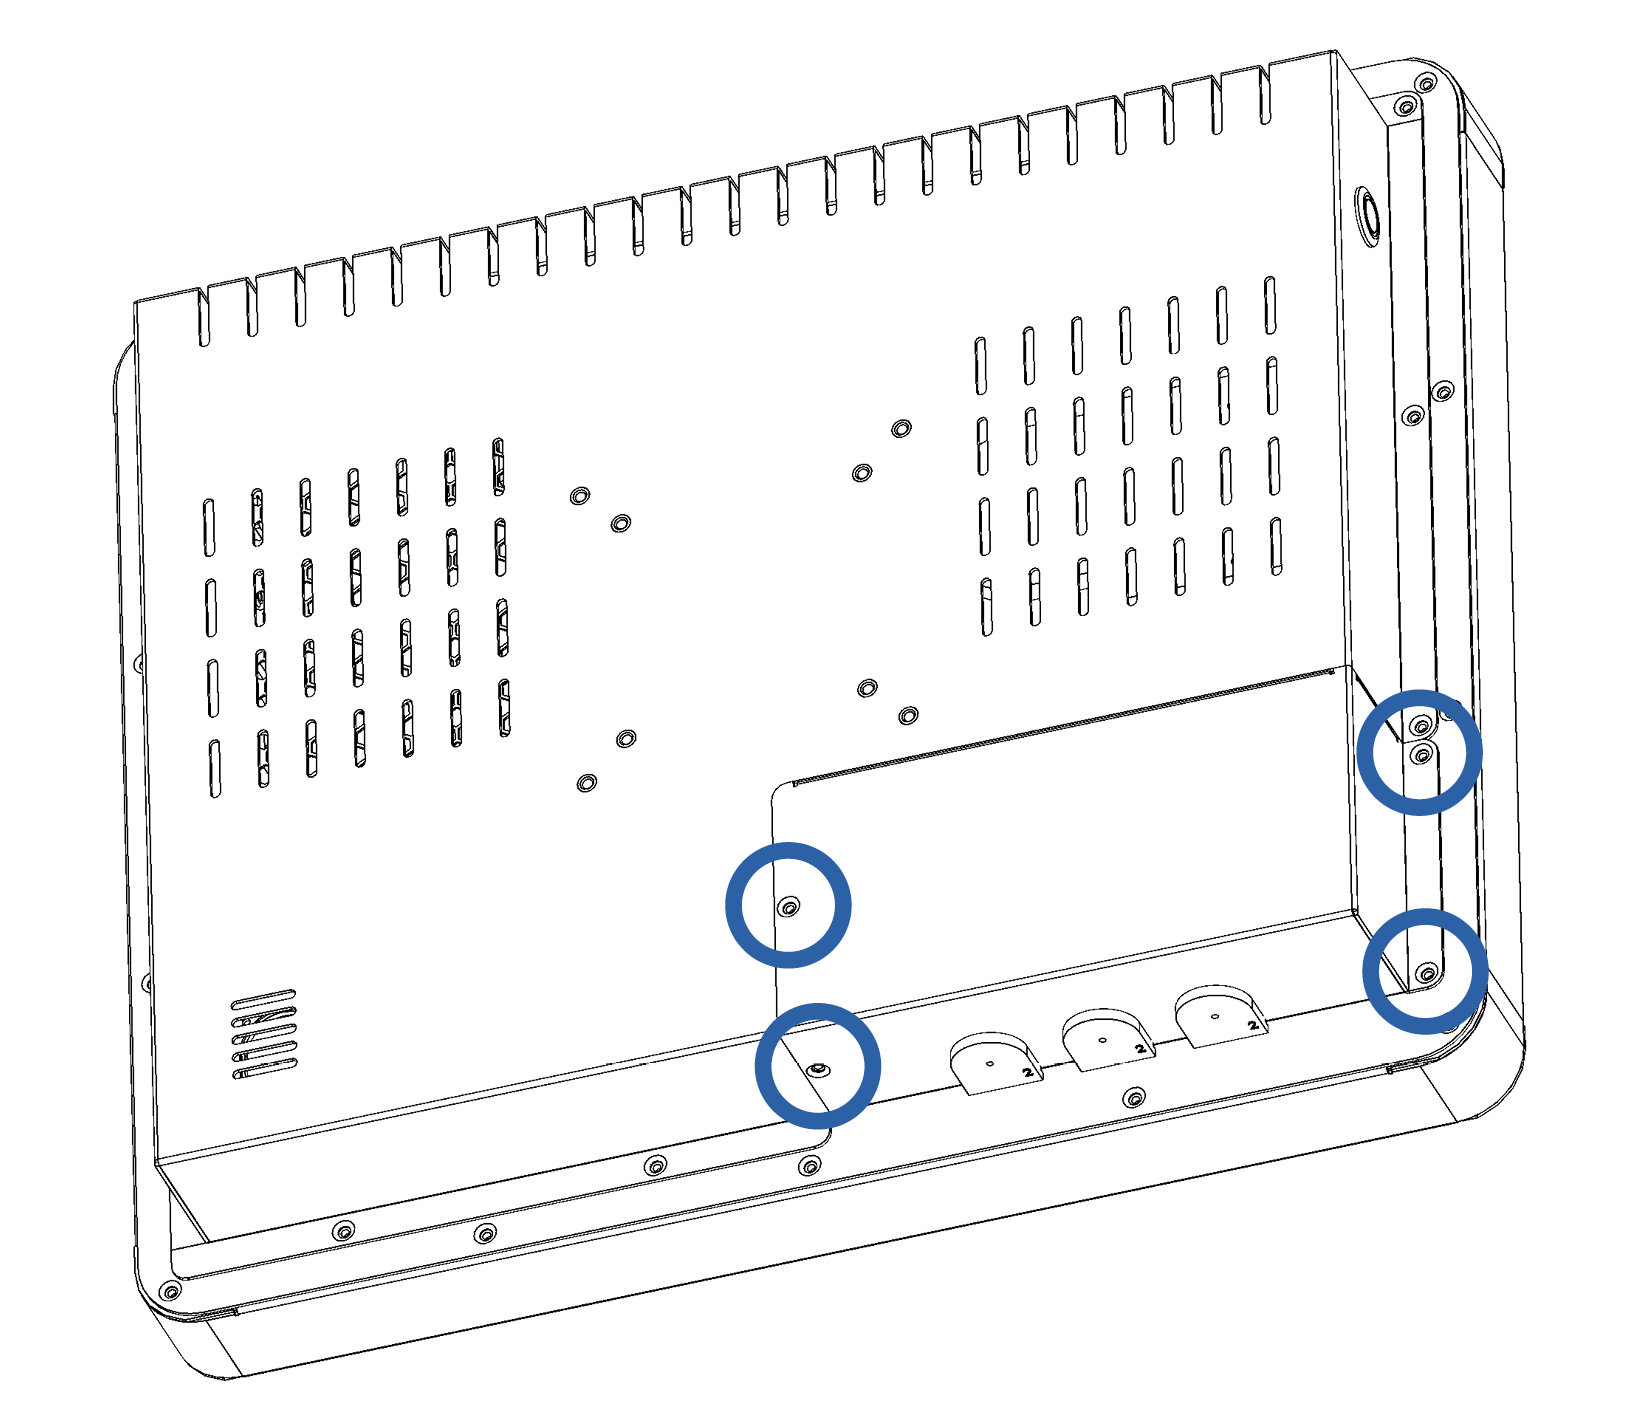
- Use a Phillips screwdriver to loosen the four screws for the service hatch and remove the door.
- Connect the device cable on the left side, and anchor it with the jumper.
- Connect the network cable to the left connector labeled LAN2.
- Connect other accessories such as receipt printer, CD/DVD reader etc according to the instructions Service hatch -> Port layout.
- Fit rubber seals around the cables that are routed through the appliance chassis.
- Use the Phillips screwdriver to reassemble the service door with the four screws provided.
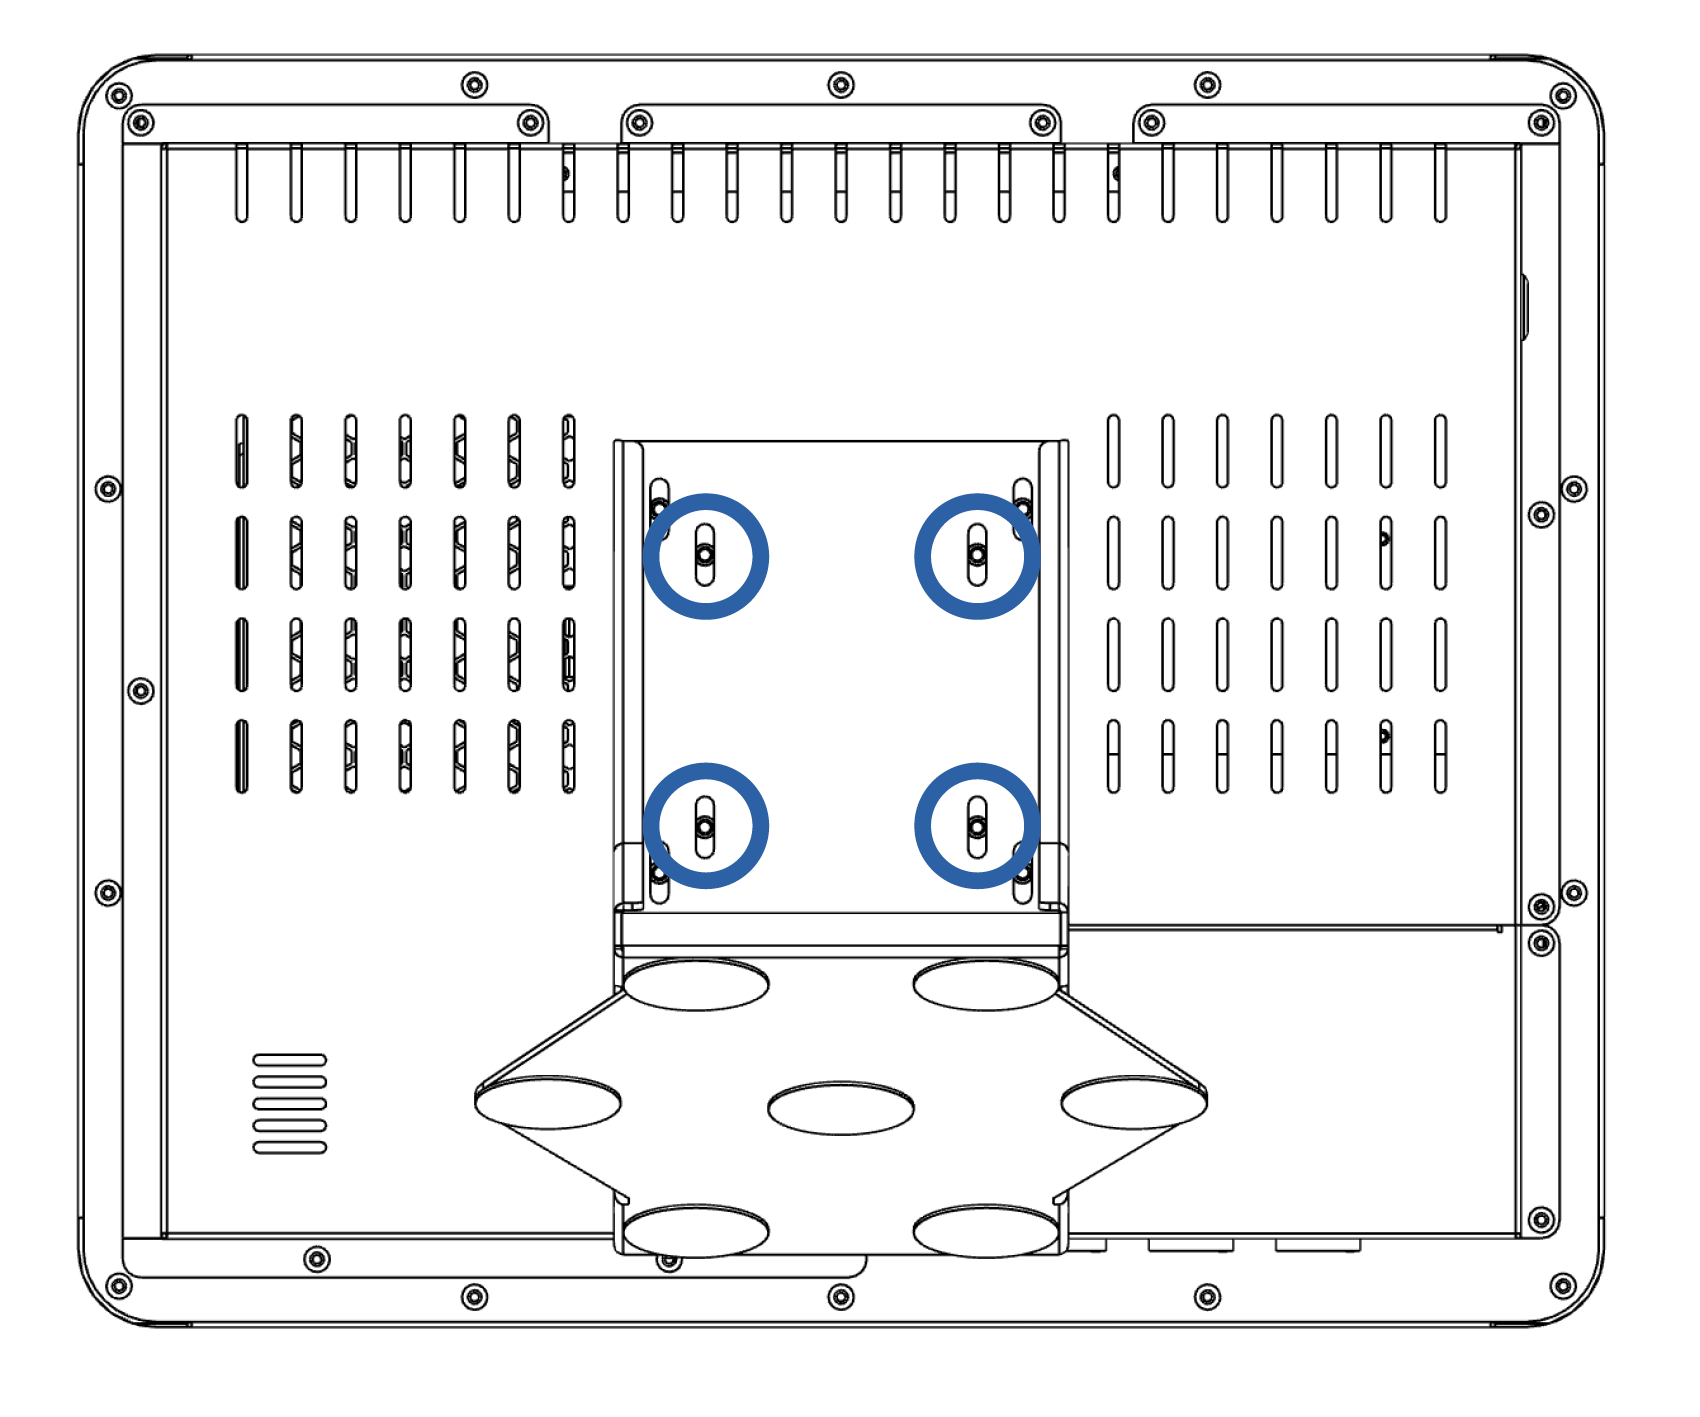
- Remove the four screws located centrally on the back of the device (Vesa bracket) to then mount the footrest, wall bracket or DIN rail a. Footrest Mount the footrest with these screws and adjust the height before tightening, so that the wiring is not pinched or twisted when setting up the device. b. Wall mounting Mount the wall bracket with these screws and adjust the height before tightening, so that the wiring is not pinched or twisted when setting up the device. c. Din rail Use these screws to mount the bracket for the DIN rail and adjust the height before tightening, so that the wiring is not pinched or twisted when setting up the device
- Plug in the other side of the device cable and the network cable, then start USB Protect.
Service hatch
The service hatch can be opened by loosening 4 pieces as shown in the picture below. The service hatch cannot be opened when the footrest is mounted.
When the service cover is removed, it is possible to connect the device cable and network cable as well as any accessories that use USB.
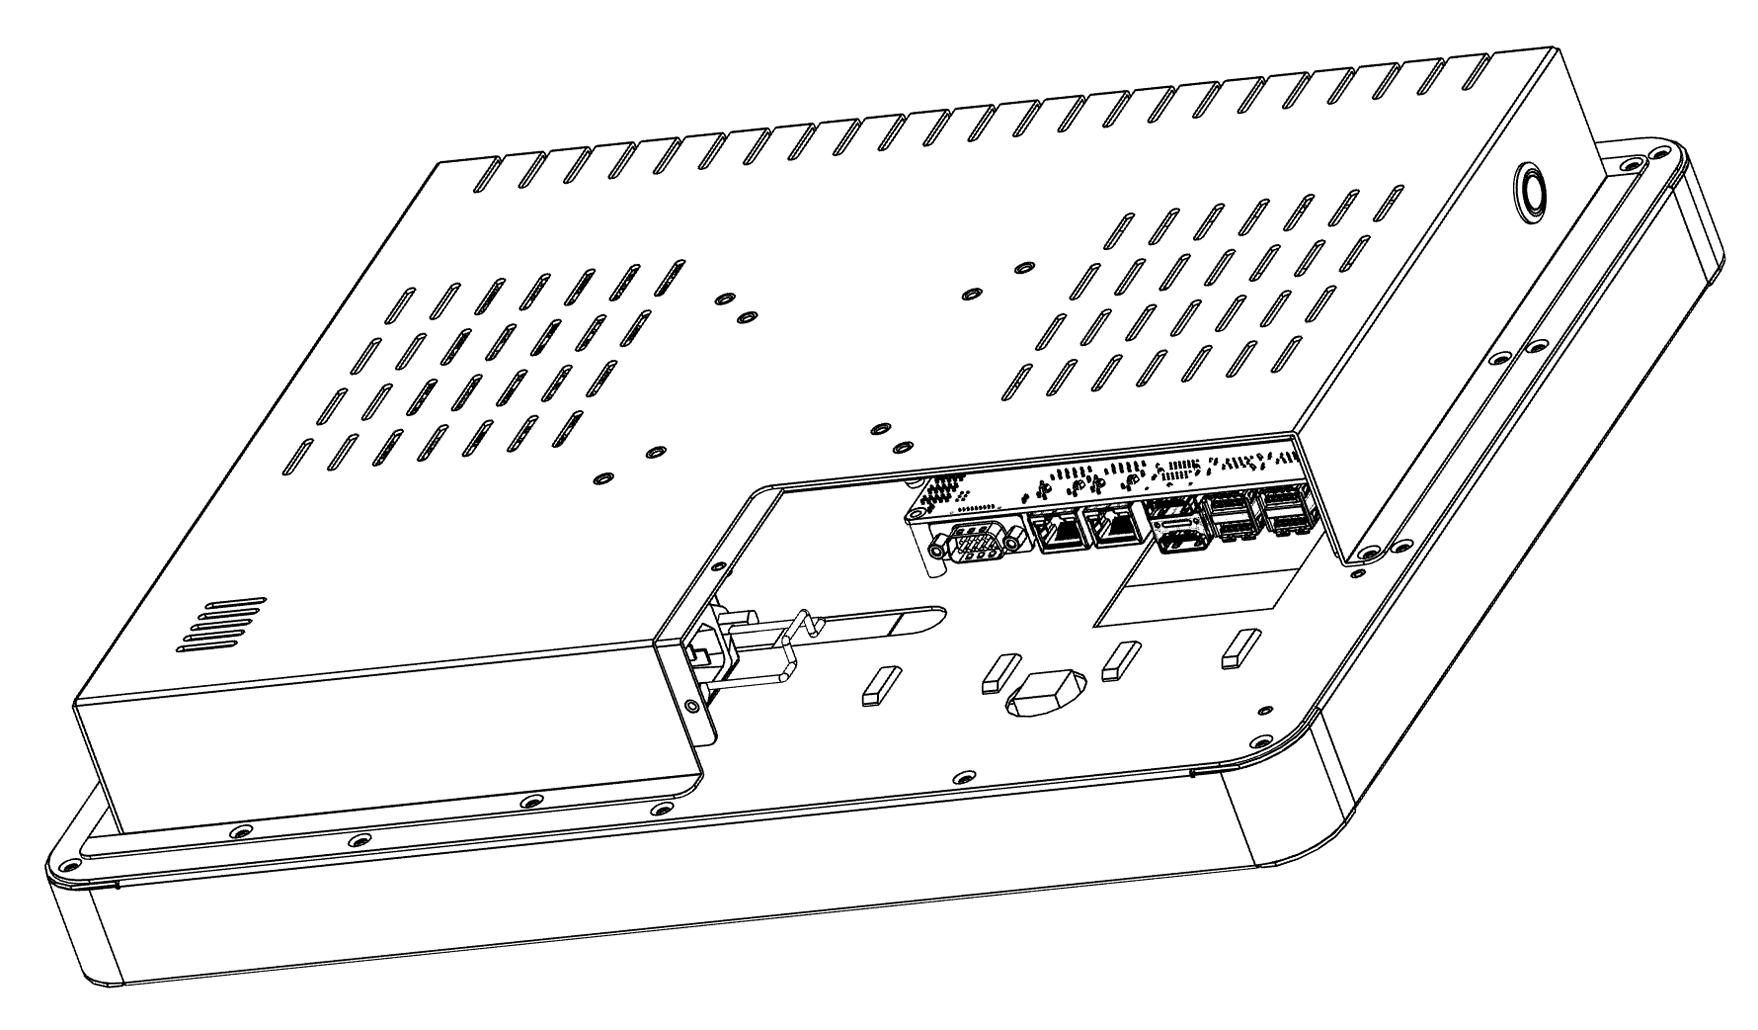
- LAN 2 port is used for connection with a network cable
- AC Power used to plug in appliance cable
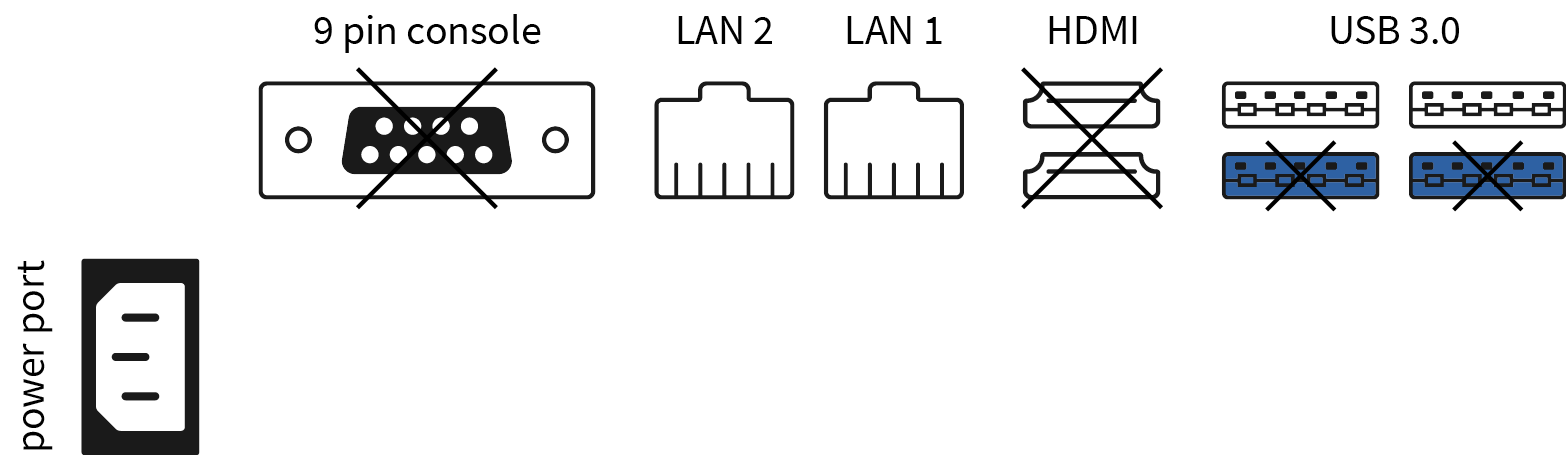
Port layout
- Crossed ports should not be used
- LAN 2 port is used for connection with a network cable
- AC Power used to plug in appliance cable
- USB3.0 ports are used for fixed connection of accessories; receipt printer, CD/DVD reader, etc.
Foot stand
Adjust the height of the foot before tightening so that the wiring is not pinched or twisted when setting up the device.